

 Here's the supplies. Measuring cups, mixing bowls, a big stainless steel pot, rubber gloves, a long knife, a wooden spoon, a strainer. Everyone has these in their kitchen. Aside from that, you need a gallon of non-ultra-pasteurized milk, which is pretty easy to find. Pasteurized milk is ok, it just can't be ultra-pasteurized. It will say right on the carton.
Aside from the milk and equipment, you need a thermometer that reads to at least 105 degrees, rennet tablets, citric acid, and non-iodized salt. I obtained these odds and ends via The New England Cheesemaking Supply Co. It all costs maybe $20, tops.
Okay. So, the first step is to put a quarter-tablet of rennet into a quarter-cup of cold, unchlorinated water. I just ran some tap water through my Britta filter. Then, take 1 1/2 tsp of citric acid, and mix it in a cup of cold unchlorinated water. Stir to dissolve, and set aside.
 Now, take your milk. Pour the whole gallon into your stainless steel pot, and set it on the stove. Pour in the citric acid solution while stirring, then continue stirring as you bring the milk temperature up to 90 degrees fahrenheit.
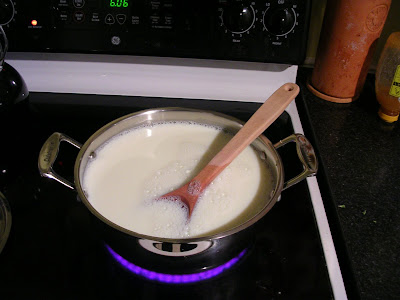 Once it's reached 90 F, take it off the burner and stir in the rennet solution. Then let the pot sit, covered, for five minutes.
 This is when the transformation begins to take place. Out of this completely ordinary, innocuous pot of milk, curds begin to emerge. After the five minutes, take your long knife and cut the curd into squares like a checkerboard. Then you'll find yourself with this:
 Pretty wild, I think. Put the pot back on the burner, and bring the temp up to 105 degrees while slowly stirring the curds. Once it's at 105, again take it off the burner, but continue stirring for 2-5 minutes. The longer you stir, the firmer the cheese will be.
 By this point, you should have two substances in the pot: goopy white blobs of curd, and clear yellowish liquid. That liquid is, naturally, the whey, as in curds and whey. When I make cheese, I keep the whey and use a little here or there, in homemade bread or soup.
 Now that you've got curds and whey, you want to separate one from the other. If you let the pot settle for a minute, the curds should sink, and you'll be able to pour off quite a bit of whey.
 Ladle the remaining curds into a microwaveable bowl.
 Now put on your special, hot pink cheesemaking rubber gloves...
 (Okay, really, they don't have to be hot pink. But I think it's best if they are.)
Microwave the curds for a minute. When you pull the bowl from the microwave, more whey will have separated from the cheese, so go ahead and pour that off. Add your salt before you forget, and any fancy-shmancy herbs you might want to throw in.
 Sundried tomato mozzarella, anyone? You want to use about a teaspoon of salt per gallon of milk.
 Almost a gallon of whey, and a nice ball of fresh mozzarella with sundried tomato bits. Oooo, yeah.
Now that you've got curds and whey, you want to separate one from the other. If you let the pot settle for a minute, the curds should sink, and you'll be able to pour off quite a bit of whey. Ladle the remaining curds into a microwaveable bowl.Now put on your special, hot pink cheesemaking rubber gloves...(Okay, really, they don't have to be hot pink. But I think it's best if they are.)
Microwave the curds for a minute. When you pull the bowl from the microwave, more whey will have separated from the cheese, so go ahead and pour that off.
Microwave now for thirty seconds, and again pour off the whey.
Now, taking your white blob of cheesy goodness in your hands, knead and stretch it over a bowl until it firms up and begins to behave like cheese.
Add your salt before you forget, and any fancy-shmancy herbs you might want to throw in. Sundried tomato mozzarella, anyone? You want to use about a teaspoon of salt per gallon of milk.You can microwave the cheese for another thirty seconds, which will help you mix in the salt. Then shape it into whatever shape you want-- ball, braid, string cheese-- and dunk the shape in the coldest water you can manage.
These are my cheese-making exploits:
Almost a gallon of whey, and a nice ball of fresh mozzarella with sundried tomato bits. Oooo, yeah.Our parents will be feasting on this ball of cheese tomorrow, since we're having them over for dinner. I've wanted to host a Tapas Party for some time now, and getting together for the first time, post-nuptials, to raise glasses of Spanish cava in celebration seems like a good occasion to me.
This time I vow to pause in the kitchen action to take pictures of my creations. It should be good fun.

3 comments:
I have been reading all about cheesemaking but haven't ventured into it yet. Thanks for the tutorial!!
You're welcome! Just use non-ultra-pasteurized 2% or whole milk, and you'll be good to go.
Where did you get your gloves? The ones I bought smelled bad! Also, is your cheese soft like Belgioso buffalo mozzarella? Do you have any suggestions for how to make it as soft as possible?
Thanks!
Post a Comment
Thank you, so much, for taking the time to chime in here. Your comments make my day. Let's do our best to keep the snarkiness at bay and be a happy, friendly place in the interwebs.