

 These tiny houses, with button windows and little felt roofs, are a great way to use some scrappy bits. Enjoy this tutorial! If you've made a little cottage based on this tute, you can add it to the new Sweetfern Flickr Group. Happy crafting!
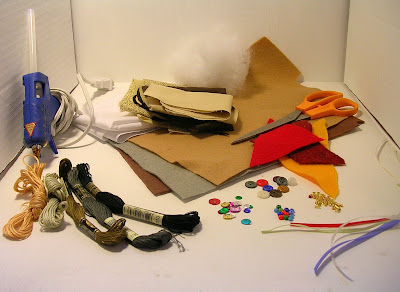 Materials:
Scraps of cotton quilting fabric in suitable cottage colors
Scraps of heavy-weight iron-on interfacing (4.5 x 4.5")
Scraps of wool or craft felt in colors suitable for chimney, roof, door, and anything else you can think of
Cereal box cardboard, for templates
Polyfil stuffing (or a few cotton balls)
Embroidery floss, beads, sequins, small buttons, for embellishing
Glue gun
Scissors
Iron
Sewing machine
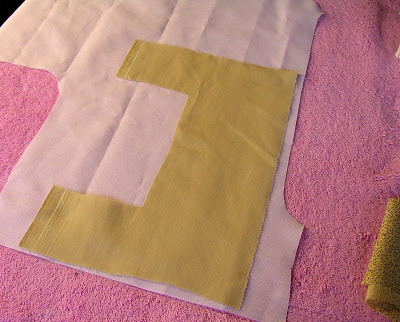
Okay. Ready? Ready. Take a scrap of cotton quilting fabric, and line it up on your interfacing. Make sure the wrong side of your fabric is facing the fusible side of the interfacing.
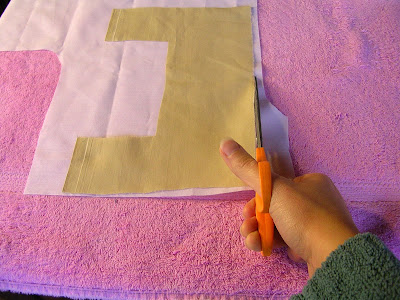
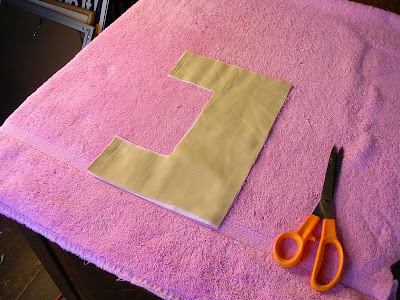
 Trim around it with scissors.
 Iron the two layers together.

Print the pattern below (it's just to scale the way it is), cut the pieces, and trace them onto cereal box cardboard. Cut out the pattern pieces.
 Trace three of the square pieces, and two of the pointy gable-end pieces on the interfacing-side of your fabric.
 Cut them out.
 Line up one square with one gable end piece as shown:
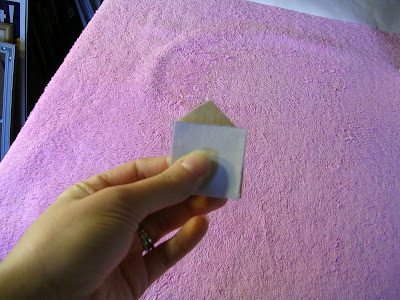 Sew them together with coordinating thread.
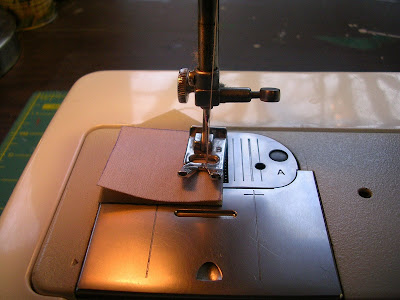 Do the same with the other gable piece and a second square piece. Now you have this:
 Sew the two pieces together, interfacing-side out.
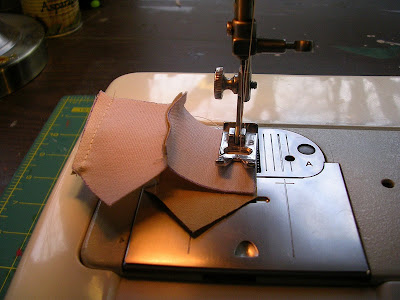 Now you have a little floorless, roofless cottage.
 Now, fit the last square into the bottom of your cottage, interfacing-side out, and sew it into place.
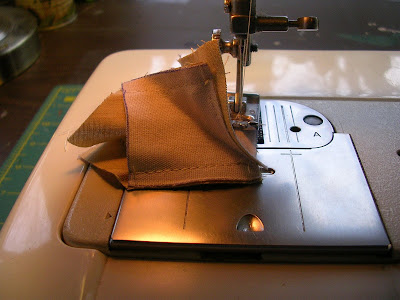
It gets better I promise! Stand it up, trim the corners a little.
 Turn it right side out. Ahh, there we go:
 Sort of. Now it's time for the fun part: embellishing. Doors, windows, shrubbery, anything you want. I embroider my embellishments-- you can use hot glue for most of them if you'd prefer.
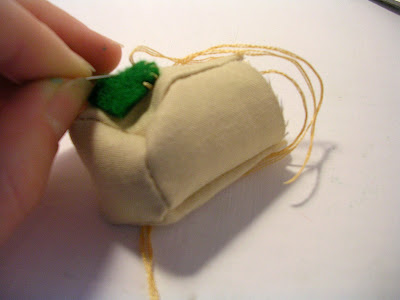
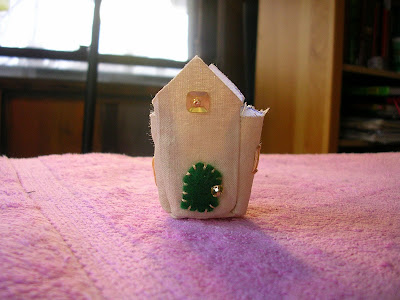 Now, we stuff. Take a pinch of Polyfil and nestle it down inside your cottage.
 Now you have this. Cut out a piece of felt in a suitably roofy color. 3 x 3" is a good size-- you get to trim it later so it doesn't have to be perfect.
 Run a bead of hot glue up the eaves of your cottage, back and front.
 Carefully press the roof into place. You can use your fingers, or some other clean, blunt object to "tweak" the gables into place before the glue sets up.
 Now, cut a little rectangular notch into the roof at the back of the cottage.
 Cut a skinny strip of felt (in a suitable chimney color) that's about the width of the notch, and long than the house is tall.
 (Ignore the junk stuck to my glue gun!) Run a bead of glue up the back of the cottage, and press the chimney into place.
 Give it a trim.
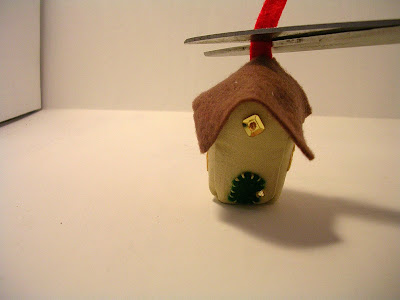 The last step is attaching a loop for hanging. Cut a 12" piece of embroidery floss (or yard, or thin ribbon, if you'd prefer) and thread it through a nice big needle. Take a little pinch with your left hand at the very peak of the roof, and push the needle through.
 Pull the thread until you've got about a 2 inch tail.
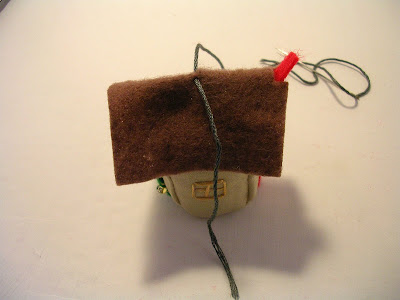 Take another stitch, just like the first.
 Un-thread your needle, and adjust your thread so there's a good-size hanging loop in the middle, and a tail on each side.
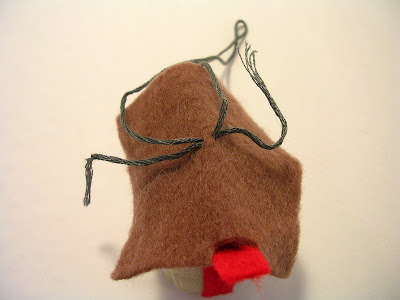 Tie the tails in a double knot, and trim the ends. Ta da!
 Make a little village and hang them on your tree!
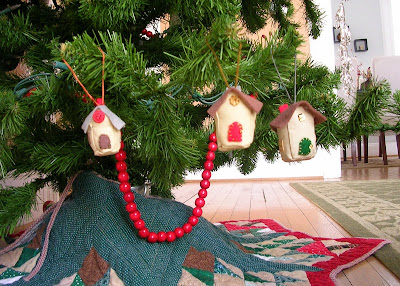 This pattern can easily be adjusted to make other buildings: churches, barns, log cabins, etc. The scale can be adjusted, as well.
 Happy village-making!

2 comments:
Cute!
Looks deceptively easy.
MadSilence to&w
Those would have to be in the upper branches at my house, or they would be really cute cat toys instead of ornaments.
Post a Comment
Thank you, so much, for taking the time to chime in here. Your comments make my day. Let's do our best to keep the snarkiness at bay and be a happy, friendly place in the interwebs.